


Small Business Accessibility Compliance
For a small business owner, the topic of website accessibility can seem intimidating. It often brings to mind thoughts of expensive developers, complicated legal rules, and a project that feels too big to handle. But what if making your website usable for people with disabilities was not a financial burden, but a smart business move? The good news is that it absolutely can be. You don’t need a huge budget to start making real improvements that open your digital doors to more customers and protect you from legal risks.
This article cuts through the noise and provides a practical, phase-by-phase approach for your small business. We will walk through how to use free tools, identify low-cost fixes that have a big impact, and prioritize your efforts to get the most value for your time and money. Making your site accessible is not an all-or-nothing race; it’s a journey of steady improvements, and you can start today with what you have.
Small Business Legal Reality Check: ADA Lawsuit Statistics 2025
Ignoring website accessibility is no longer an option, especially for smaller companies. The legal landscape has shifted dramatically, and what was once seen as a problem for large corporations is now a direct and growing threat to small businesses across the country. Understanding the current trends is the first step in protecting your business.
Rising Litigation Targeting Small Businesses
Digital accessibility lawsuits are increasing at an alarming rate. In the first half of 2025 alone, plaintiffs filed over 2,000 lawsuits, marking a surge of up to 37% compared to the previous year. The most critical takeaway for small business owners is who these lawsuits are targeting. Data shows that small businesses with revenues under $25 million are the defendants in the vast majority of cases, as high as 66% to 77% of all accessibility lawsuits filed.
This surge isn’t accidental. Plaintiff law firms are using automated scanning tools that can quickly identify websites with common accessibility violations. This has led to a 23% jump in website accessibility cases in just the first quarter of 2025. Furthermore, these legal challenges are no longer confined to states like California and New York. Filings are rapidly increasing in Texas, Ohio, North Carolina, and Illinois, showing that no business is safe based on location alone. Attorneys are also targeting multi-location businesses and franchises, allowing them to file numerous similar lawsuits efficiently.
Settlement Amounts and Legal Costs
The financial consequences of an ADA lawsuit can be severe for a small business. A settlement can cost anywhere from $15,000 to $100,000, and that figure doesn’t even include your own legal defense fees or the plaintiff’s attorney fees, which you are often required to pay. On top of that, you will still be required to fix the accessibility issues on your website, often on a tight and expensive deadline.
When you compare these potential six-figure costs to the price of proactive compliance, the choice is clear. A basic accessibility review might cost between $500 and $2,500, and many of the most critical fixes can be made for little to no money. Investing a small amount of time and money upfront is a far better financial strategy than waiting for a demand letter to force your hand.
Phase 1: Free Assessment and Priority Identification
The first step toward an accessible website doesn’t require a budget, just a willingness to look at your site from a new perspective. By using free tools and performing simple manual checks, you can create a clear roadmap for what needs to be fixed first.
Using Free Testing Tools Effectively
Automated testing tools are a great starting point for identifying common accessibility problems. They scan your web pages and flag issues that could create barriers for people with disabilities. Many of these tools are free and easy to use.
Some of the most respected free tools include:
- WAVE: Created by the experts at WebAIM, this browser extension provides a visual overlay on your page, showing where accessibility errors exist.
- Axe DevTools: A favorite among developers, this browser extension finds a significant number of violations and categorizes them by severity, with links to remediation advice.[11]
- Accessibility-Test.org‘s Free Scanner: Automated tools like this one offer a quick way to get an overview of common issues on your site, providing a valuable starting point.
- Google Lighthouse: Built directly into the Chrome browser, it includes an accessibility audit that can give you a score and a list of improvements.
These tools are excellent for finding problems like missing image descriptions or color contrast errors. However, keep in mind they can only automatically detect about 30-57% of all potential issues. That’s why manual testing is also essential.
Manual Testing You Can Do Yourself
Some of the most significant accessibility barriers can’t be found by an automated scanner. You need to interact with your website just as a person with a disability would. Here are a few simple tests you can perform yourself without any special expertise:
- The Keyboard Test: Unplug your mouse and try to navigate your website using only the Tab key. Can you get to every link, button, and form field? Can you tell where you are on the page at all times (this is called “focus indication”)? If you get stuck or can’t operate a feature, you’ve found a critical barrier.
- Check Your Forms: Can you fill out your contact or checkout forms using only your keyboard? Are the labels for each field clear? Do you get helpful error messages if you miss something?
- Read Your Content: Is your text easy to understand? Are your headings and subheadings clear and descriptive? Good structure helps everyone, including screen reader users who use headings to skim content.
For a more structured approach, you can use the ADA Checklist for Existing Facilities from the ADA National Network as a guide to ask the right questions about your digital space.
Identifying High-Impact, Low-Cost Fixes
After running automated scans and performing your manual tests, you’ll likely have a list of issues. Don’t let it overwhelm you. The next step is to prioritize. Focus on the “low-hanging fruit”, the fixes that are easy and cheap to implement but make a huge difference to users.
For example, adding descriptive text to your images is often free and just takes a bit of time. Fixing the color contrast of your text might only require a small change in your website’s style settings. By identifying these high-impact issues first, you can make significant progress without needing a large budget. Prioritize problems that prevent users from completing key tasks, like accessing your navigation, filling out a form, or making a purchase.
Phase 2: Essential Accessibility Improvements Under $500
Once you have identified the most critical issues, it’s time to start fixing them. You might be surprised how many significant improvements can be made for very little money. Often, a budget of under $500 is more than enough to tackle the most common and legally risky problems.
Alt Text and Image Accessibility
Alternative text, or “alt text,” is a short description added to an image in your website’s code. This text is read aloud by screen readers, allowing users with visual impairments to understand the content of the image. This is one of the most fundamental aspects of web accessibility.
Adding alt text is almost always free; it’s a feature built into every modern website content management system (CMS). The key is to write descriptions that are meaningful. If an image conveys information, the alt text should convey that same information. For example, instead of “graph,” write “Graph showing a 23% increase in website lawsuits in 2025.” This is a fix that costs you nothing but time, yet it instantly makes your visual content accessible.
Color Contrast Quick Fixes
For text to be readable, there must be enough contrast between its color and the background color. People with low vision or color blindness may not be able to read text if the contrast is too low.
You can use a free online color contrast checker to test the combinations on your site. If you find problems, the fix is often as simple as changing a color value in your website’s CSS file. If you’re not comfortable doing this yourself, a developer can typically make these adjustments in an hour or two. This small investment, often between $0 and $150, can make your site readable for a much wider audience.
Basic Keyboard Navigation
As discovered in the manual testing phase, your site must be fully operable with a keyboard. If users get stuck in a “keyboard trap” or can’t see which element is in focus, they cannot navigate your site. Fixing these issues may require a developer’s help, as it often involves adjusting the underlying code (HTML and JavaScript). However, many common focus and navigation problems are straightforward for a developer to resolve. Correcting these basic keyboard accessibility issues often falls within a budget of $150 to $500, making it an affordable and essential investment.
Phase 3: Choosing Budget-Friendly Testing Tools
As you move from initial fixes to ongoing maintenance, your approach to testing may evolve. While free tools are perfect for getting started, understanding when and why you might consider a paid solution is part of a smart, long-term strategy.
Free Tools That Provide Professional Results
It’s worth repeating: the free tools available today are incredibly powerful. Tools like Axe DevTools, WAVE, and the NVDA screen reader are not “amateur” options; they are used by professional accessibility testers every day. The primary “cost” of using these tools is time, as they typically work on one page at a time.
For a small business, dedicating a few hours each month to manually spot-checking key pages with these tools is a perfectly valid and effective way to manage accessibility. By learning how to use these tools, you are empowering yourself to find and fix issues without having to pay a consultant for every little thing. This hands-on approach also gives you a much deeper understanding of the barriers users can face.
When to Invest in Paid Solutions
You should consider investing in a paid solution when the time you spend on manual testing starts to cost you more than a subscription would. Paid accessibility tools offer automation and scale that free tools don’t. For instance, tools like Axe Monitor or Tenon.io can automatically scan your entire website on a regular schedule, track issues over time, and provide detailed reports that can be shared with a development team.[11]
If your website is large, changes frequently, or is managed by multiple people, a paid tool can help ensure that new accessibility issues don’t slip through the cracks. These solutions are for when you’re ready to move from a reactive, page-by-page approach to a proactive, site-wide monitoring system.
Tool ROI Analysis for Small Businesses
For a small business, every expense needs to be justified. When it comes to paid accessibility tools, the return on investment (ROI) is best measured through risk mitigation. A subscription to an automated monitoring tool might cost a few hundred to a couple of thousand dollars a year.
Now, compare that cost to the potential price of a single accessibility lawsuit, which can easily exceed $20,000 in settlements and legal fees. A paid tool provides a documented, good-faith effort to find and fix issues, which can be invaluable in a legal situation. It saves you time, helps you catch problems faster, and provides a layer of protection that makes it a very sensible business investment.
Focus Strategy: Most Important Pages First
You don’t need to make your entire website perfectly accessible overnight. A smarter approach is to focus your efforts on the pages that are most critical to your customers’ experience. By stabilizing these key areas first, you address the biggest risks and deliver the most value upfront.
Homepage and Navigation Priorities
Your homepage is the digital front door to your business. If a user with a disability can’t understand what you do or how to navigate from the homepage, they will likely leave and never come back. Likewise, your main navigation menu is the map to your entire site.
Start by ensuring your homepage is clear and your navigation is fully accessible via keyboard. Every link in your menu should be reachable and clearly describe where it leads. Fixing these core components should be your top priority, as they affect every single visitor’s ability to use your site.
Contact Forms and Customer Interaction
What happens when a customer has a question or wants to get in touch? If your contact form is inaccessible, you are cutting off a vital line of communication. A user who is unable to submit a form because it doesn’t work with their screen reader or keyboard is a lost lead.
Test your contact forms, comment sections, and any other interactive elements where customers engage with you. Make sure every form field is clearly labeled and that error messages are communicated accessibly. This ensures that all potential customers have a way to reach you.
Product/Service Information Pages
These are the pages that directly drive your revenue. Whether you’re selling products, services, or appointments, customers need to be able to access the information required to make a purchase decision. If a user can’t read product descriptions, see pricing, or operate an “add to cart” button, you are losing a sale.
After securing your homepage and contact methods, turn your attention to these key conversion pages. Walk through the customer journey from a product page to checkout, testing for accessibility barriers at each step. Fixing issues here has a direct and positive impact on your bottom line.
Widget Considerations: Pros, Cons, and Realistic Expectations
When researching accessibility, you will inevitably come across “accessibility widgets” or “overlays.” These are tools that you can install on your site, often for a monthly fee, which add a button that users can click to apply accessibility adjustments like changing font sizes or contrast.
The pro of these widgets is that they are fast and easy to install. For a business owner with no technical knowledge, they can feel like a quick win. They provide some user-facing controls that can be helpful to some people in some situations.
However, the cons are significant. These widgets do not fix the underlying code of your website. An automated scanner or a plaintiff’s expert can still find the accessibility errors that exist in your site’s structure. Many accessibility advocates argue that widgets provide a “separate but unequal” experience and do not constitute true compliance with the law. While they may help with a few specific issues, they are not a comprehensive solution and will not prevent you from being sued.
It’s best to have realistic expectations. A widget should be seen as a supplementary tool or a temporary stopgap, not a one-and-done fix. True, lasting accessibility comes from remediating the code of your website itself. Relying solely on a widget is a risky strategy that provides a false sense of security.
Creating Accessibility Statements and Ongoing Monitoring
Making your website accessible is not a project that you finish once and then forget about. It’s an ongoing commitment. Two key practices for maintaining accessibility are creating an accessibility statement and establishing a process for regular monitoring.
An accessibility statement is a page on your website that publicly declares your commitment to accessibility. It signals to users and lawyers alike that you take this issue seriously. A good statement should:
- Acknowledge accessibility standards like the WCAG.
- Mention some of the steps you have taken to improve your site.
- Provide a way for users with disabilities to contact you if they run into a barrier.
You don’t need to hire a lawyer to write one; you can start by adapting a free template to fit your business. This simple page demonstrates a good-faith effort to comply.
Ongoing monitoring is the process of making sure your site stays accessible as you add new content and features. This doesn’t have to be complicated. You can create a simple checklist for anyone who publishes new content, reminding them to add alt text to images and use proper headings. Additionally, you should plan to periodically re-scan your key pages with free tools like WAVE or Axe to catch any new issues that may have been introduced.

Total Cost Breakdown: What Small Businesses Actually Spend
Achieving accessibility doesn’t have to break the bank. By taking a phased approach and focusing on the most important fixes, the cost can be very manageable. The biggest investment for a small business is often time, the time to learn the basics, test your pages, and make simple content updates.
Here is a realistic breakdown of what you might spend when following a budget-friendly strategy:
As this table shows, you can make a tremendous amount of progress for under $500. The most critical, legally-risky issues can often be resolved within this budget. By prioritizing smartly, you can protect your business from lawsuits and open your doors to a wider market of customers without needing a massive financial outlay.
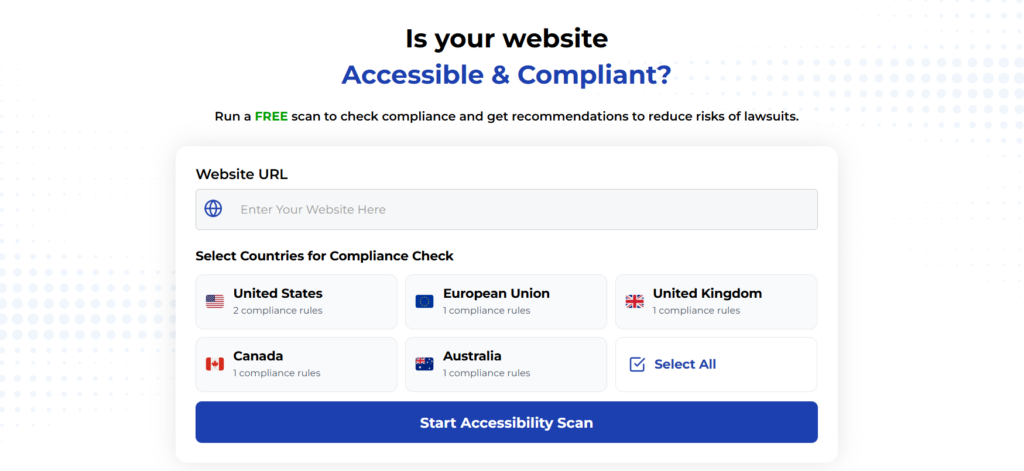
Using Automated Tools for Quick Insights (Accessibility-Test.org Scanner)
Automated testing tools provide a fast way to identify many common accessibility issues. They can quickly scan your website and point out problems that might be difficult for people with disabilities to overcome.
Visit Our Tools Comparison Page!
Run a FREE scan to check compliance and get recommendations to reduce risks of lawsuits
Final Thoughts
Ready to take the first step? Start your journey today by using a free website accessibility scanner to identify immediate opportunities for improvement on your site.
Run a Free Scan to Find E-commerce Accessibility Barriers
Want More Help?
Try our free website accessibility scanner to identify heading structure issues and other accessibility problems on your site. Our tool provides clear recommendations for fixes that can be implemented quickly.
Join our community of developers committed to accessibility. Share your experiences, ask questions, and learn from others who are working to make the web more accessible.