


5 Free Accessibility Tools Industry Experts Rely On
Finding the right tools to test website accessibility can make the difference between an inclusive site and one that creates barriers for users with disabilities. While many companies invest in expensive testing solutions, several free tools offer powerful features that rival premium options. These tools help catch issues early in development when they’re easiest to fix. This article explores five free accessibility testing tools that professionals depend on but many teams haven’t yet discovered.
Accessibility Testing Toolkit
No single tool catches every accessibility issue-that’s why experts use a mix of specialized tools to examine different aspects of web accessibility. From automated scans to manual testing aids, each tool serves a specific purpose in finding potential barriers.
By building a toolkit of complementary testing resources, you’ll catch more issues before they reach users. The five tools we’ll cover work together to provide a more thorough picture of your site’s accessibility, helping you meet WCAG guidelines, ADA requirements, and Section 508 compliance standards.
Tool #1 Axe DevTools
Axe by Deque Systems ranks among the most trusted accessibility testing tools available. This browser extension helps developers find and fix issues during the development process, significantly reducing the cost and effort of remediation compared to finding problems after launch.
The 2025 version of Axe DevTools has improved its capabilities, increasing automated test coverage by up to 10% compared to traditional approaches. This makes it an excellent option for teams looking to catch more issues with less effort.
Installation and Setup Guide
Getting started with Axe DevTools is straightforward. The extension is available for multiple browsers:
Chrome:
- Visit the Chrome Web Store and search for “axe DevTools”
- Click “Add to Chrome” to install the extension
- Once installed, you’ll find it in your browser’s developer tools panel
Firefox:
- Visit Mozilla Add-ons and search for “axe DevTools”
- Click “Add to Firefox” to install the extension
- Access it through Firefox’s developer tools
Edge:
- Visit Edge Add-ons and search for “axe DevTools”
- Click “Add to Edge” to install the extension
- Access it through Edge’s developer tools
After installation, open the developer tools in your browser (F12 on Windows or Command+Option+I on Mac), and select the “axe DevTools” tab. You may need to click the “+” icon to see all available tools if it’s not immediately visible.
Key Features for WCAG Testing
Axe DevTools stands out for its accurate testing capabilities and user-friendly interface. Key features include:
- One-click full page scanning that quickly identifies accessibility issues
- Zero false positives, ensuring you don’t waste time on non-issues
- Clear categorization of issues by severity (critical, serious, moderate, minor)
- Detailed explanations of each issue with reference to specific WCAG success criteria
- Code snippets highlighting exactly where problems exist
- Practical remediation guidance to help fix issues quickly
The tool specifically excels at identifying issues related to ARIA roles, states, and properties. It can verify that elements have valid attribute values and appropriate accessible names. For developers working on complex interactive components, this level of detail proves invaluable.
Integrating with Development Workflow
What makes Axe DevTools particularly useful is how easily it integrates into existing development processes. The extension offers several features to streamline workflows:
- Export functionality to save results in CSV format for documentation and tracking
- New Jira integration (as of March 2025) allowing direct issue creation from test results
- Ability to highlight affected elements directly on the page for easy identification
- Component-level testing to focus on specific parts of a page rather than full-page scans
For teams using Jira for issue tracking, the new integration streamlines the process considerably. As shown in the March 2025 update, developers can select issues they want to address, click “share to Jira Cloud,” choose a template, add labels, and quickly create tickets directly from the extension.
Tool #2 WAVE Evaluation Tool
WAVE (Web Accessibility Evaluation Tool) by WebAIM offers a different approach to accessibility testing. Unlike some tools that focus purely on code analysis, WAVE provides visual feedback directly on your web page, making it easier to understand context and relationships between elements.
Browser Integration Methods
Installing WAVE is simple across all major browsers:
Chrome:
- Visit the Chrome Web Store and search for “WAVE Evaluation Tool”
- Click “Add to Chrome” to install the extension
Firefox:
- Visit Mozilla Add-ons and search for “WAVE Evaluation Tool”
- Click “Add to Firefox” to install
Edge:
- Visit Edge Add-ons and search for “WAVE Evaluation Tool”
- Click “Add” to install
Once installed, you can run WAVE in three ways:
- Click the WAVE icon in your browser’s toolbar
- Use keyboard shortcuts: Ctrl+Shift+U on Windows or Command+Shift+U on Mac
- Right-click on the page and select “WAVE this page” from the context menu
WAVE works especially well for testing password-protected, locally hosted, or intranet pages since all analysis happens directly in your browser without sending data to external servers.
Understanding WAVE Reports
When you run WAVE, it displays a sidebar with findings organized into six categories:
- Errors – Accessibility issues that need to be fixed
- Contrast Errors – Text that doesn’t meet contrast requirements
- Alerts – Potential issues that require human verification
- Features – Accessibility features already present
- Structural Elements – Information about page structure
- ARIA – ARIA attributes used on the page
The tool adds icons directly onto your webpage, making it easy to see exactly where issues occur. These icons are color-coded and designed with distinctive shapes to remain accessible even to those with color vision deficiencies.
WAVE’s interface includes four main panels accessible through tabs:
- Details – Lists all findings by category
- Reference – Provides information about specific issues
- Structure – Shows heading structure and other organizational elements
- Contrast – Details on color contrast issues
Addressing Common Flagged Issues
WAVE excels at identifying several common accessibility barriers:
- Missing alternative text for images
- Empty links or buttons without meaningful text
- Missing form labels
- Poor heading structure
- Contrast issues between text and background
For example, if WAVE flags an image missing alt text, you can click on the error icon to see a detailed explanation of why alternative text matters and how to fix the issue. This educational approach helps teams learn accessibility principles while fixing specific problems.
WAVE also identifies positive features already present on your page, helping you understand what you’re doing right. This can reinforce good practices and provide examples to follow elsewhere on your site.

Tool #3 Keyboard Testing Framework
Keyboard accessibility forms a fundamental aspect of web accessibility. Many users rely on keyboards instead of mice due to motor disabilities, while others (including many screen reader users) prefer keyboard navigation for efficiency.
No single tool can fully automate keyboard testing, but creating a structured approach using free tools and manual techniques helps ensure your site works for keyboard-only users.
Setting Up Automated Keyboard Testing
While fully automated keyboard testing has limitations, you can set up basic tests using free tools:
- Axe DevTools can identify some keyboard accessibility issues, such as elements without keyboard focus indicators or interactive elements that can’t receive focus.
- Browser developer tools can help test tab order:
- In Chrome DevTools, use the “Elements” panel and press Tab repeatedly to see the focus order
- Watch how focus moves through the page and identify any illogical sequences
- Lighthouse (built into Chrome DevTools) includes keyboard accessibility checks in its accessibility audit
These automated approaches catch fundamental issues but should be supplemented with manual testing for a complete picture.
Manual Testing Protocols
For thorough keyboard testing, follow these steps on every page:
- Start with the browser’s address bar and press Tab
- Continue pressing Tab to move through all interactive elements
- Verify that:
- Focus indicators are clearly visible on all elements
- All interactive elements can be reached via Tab
- The tab order follows a logical sequence (typically left to right, top to bottom)
- No keyboard traps exist (places where you can tab into but not out of)
- Drop-down menus, modal dialogs, and custom widgets work with keyboard
- Test special keyboard commands:
- Enter to activate links and buttons
- Space to toggle checkboxes
- Arrow keys to navigate select menus, radio buttons, and sliders
- Escape to close modals and dialogs
Document your findings systematically, noting any elements that can’t be accessed or operated using only a keyboard.
Fixing Common Keyboard Issues
1. Several keyboard accessibility issues appear frequently and have straightforward fixes:
Solution: Ensure all hover-triggered content is also available through keyboard focus events
Missing focus indicators
- Problem: CSS that removes outlines (outline: none or outline: 0) without providing alternatives
Solution: Either retain browser default focus styles or create custom, visible focus indicators with at least 3:1 contrast ratio
Non-focusable interactive elements
- Problem: Custom controls built without proper keyboard support
Solution: Add tabindex=”0″ to make custom elements focusable and implement keyboard event handlers
Illogical tab order
- Problem: Content that doesn’t follow a natural reading order when tabbing
Solution: Ensure DOM order matches visual layout or use tabindex attributes to specify order
Keyboard traps
- Problem: Custom widgets that capture keyboard focus without allowing users to exit
Solution: Always implement an exit mechanism, typically using the Escape key
Hover-only content
- Problem: Content that appears on mouse hover but can’t be accessed via keyboard

Tool #4 Color Contrast Analyzer
Color contrast issues affect many users, including those with low vision, color blindness, or those using devices in bright sunlight. Several free tools help identify and fix contrast problems to meet WCAG requirements.
Installation and Usage Guide
One popular option is the Colour Contrast Analyser (CCA) from TPGi:
- Visit TPGi’s website and download the free Colour Contrast Analyser for your operating system
- Install the program following the standard installation process
- Launch the application to start analyzing colors
Another excellent option is WebAIM’s Contrast Checker:
- Visit WebAIM’s contrast checker website
- Use the tool directly in your browser without installation
- Enter color values or use the eyedropper tool to select colors from your screen
Both tools offer similar functionality but in different formats-one as a standalone application and the other as a web-based tool.
Testing Against WCAG Standards
When using these contrast tools, you’ll need to understand the WCAG contrast requirements:
- Normal text (smaller than 18pt or 14pt bold): Requires at least 4.5:1 contrast ratio for WCAG AA compliance and 7:1 for AAA
- Large text (18pt+ or 14pt+ bold): Requires at least 3:1 contrast ratio for WCAG AA and 4.5:1 for AAA
- User interface components and graphical objects: Require at least 3:1 contrast ratio
The Colour Contrast Analyser provides results for all these requirements, showing pass/fail indicators for each category. This makes it easy to see whether your color choices meet different WCAG compliance levels.
WebAIM’s tool includes a handy lightness slider that lets you adjust colors until they pass requirements. This feature proves particularly useful when you need to maintain brand colors while improving accessibility.
Implementing Color Recommendations
When fixing contrast issues, follow these practical steps:
- Test all text colors against their background colors throughout your site
- Pay special attention to:
- Text on image backgrounds
- Link text (both default and visited states)
- Form elements and labels
- Button text
- Error messages and status indicators
- When you identify failing combinations, adjust either:
- The foreground color (usually making text darker)
- The background color (usually making backgrounds lighter or less saturated)
- Or both, to achieve the required contrast ratio
- Keep brand guidelines in mind while making adjustments:
- Use darker/lighter versions of brand colors rather than completely different hues
- Consider using patterns or borders to increase contrast between similar colors
- Apply subtle background effects like slight gradients or shadows to improve readability
- Retest after implementing changes to verify compliance
Additionally, both tools offer color blindness simulators that show how your color combinations appear to users with different types of color vision deficiencies. This helps ensure your content remains understandable to all users regardless of how they perceive colors.
Tool #5 Screen Reader Testing Environment
Screen readers are essential assistive technologies for blind users and those with severe visual impairments. Testing with screen readers helps ensure these users can access and understand your content.
Setting Up Free Screen Readers
NVDA (NonVisual Desktop Access) is a free, open-source screen reader for Windows that has become the preferred testing tool for many developers:
- Visit NV Access website to download NVDA
- Run the installer and follow the setup instructions
- Choose whether to install permanently or create a portable version on a USB drive
- Complete the installation process
- NVDA will start reading screen content immediately upon launch
For testing, NVDA works best with Chrome or Firefox browsers. This combination provides the most reliable results that generally reflect what users experience.
The NVDA modifier key (used in keyboard commands) defaults to Insert but can be changed to Caps Lock for easier access. Most testers prefer using Caps Lock as the NVDA key.
Testing Methodology for Developers
When testing with NVDA, follow a structured approach:
- Start by testing page navigation:
- Press H to move through headings and check heading hierarchy
- Press T to navigate tables
- Press L to move through lists
- Press K to navigate links
- Use the Tab key to move through interactive elements
- Test form elements:
- Verify that all form controls have proper labels that are announced
- Check that error messages are announced when they appear
- Ensure required fields are properly identified
- Verify that select menus, checkboxes, and radio buttons can be operated
- Test dynamic content:
- Verify that notifications and status updates are announced
- Check that modal dialogs and popups are properly focused
- Ensure that ARIA live regions announce updates appropriately
- Document specific issues you encounter, noting:
- What the screen reader announced (or failed to announce)
- What element caused the issue
- What action triggered the problem
When conducting tests, it helps to use headphones so you can hear exactly what’s being announced without disturbing others.
Interpreting Screen Reader Output
Understanding what NVDA tells you requires familiarity with how screen readers process content:
- Element types are announced along with content:
- “Heading level 2” before heading text
- “Link” before link text
- “Button” before button labels
- “Checkbox checked/not checked” for checkboxes
- ARIA attributes affect announcements:
- aria-label overrides visible text
- aria-describedby adds additional description
- aria-expanded announces state of expandable elements
- Common problems to listen for:
- Images with missing or inadequate alt text
- Buttons or links with unclear purposes
- Form fields without proper labels
- Complex data tables that don’t make sense aurally
- Content that disappears without warning
- Positive indicators include:
- Clear heading hierarchy that matches visual structure
- Concise, meaningful link text
- Form fields that clearly announce their purpose and state
- Updates that properly announce without interrupting the user
Remember that screen reader testing is about understanding the experience, not just checking if elements are technically accessible. Consider whether a blind user would understand the purpose and functionality of each page element based solely on what’s announced.
Creating an Accessibility Testing Workflow
Individual tools only provide value when integrated into a consistent testing process. Creating a workflow that combines these free tools helps catch more issues while fitting naturally into development cycles.
Integrating Tools into Development Cycles
Accessibility testing works best when incorporated throughout the development process rather than tacked on at the end:
- Planning phase:
- Review similar components on existing pages using Axe DevTools and WAVE
- Test color schemes with Contrast Analyzer before finalizing designs
- Create keyboard accessibility requirements for interactive elements
- Development phase:
- Run Axe DevTools on components during development
- Test keyboard navigation while building interactive elements
- Verify color contrast as styles are implemented
- QA phase:
- Run full-page scans with both Axe DevTools and WAVE
- Perform structured keyboard testing using established protocols
- Test with NVDA screen reader to verify content accessibility
- Post-launch:
- Schedule regular automated scans of live pages
- Document and prioritize issues for future sprints
- Create a feedback mechanism for users to report accessibility problems
This integrated approach catches issues earlier when they’re cheaper and easier to fix. It also builds accessibility knowledge across the team as everyone becomes familiar with testing tools and techniques.
Establishing Testing Protocols
Documenting standard testing protocols ensures consistency across team members and projects:
- Create checklists for different testing phases:
- Quick checks during development
- More thorough testing during QA
- Complete accessibility audits for major releases
- Standardize how issues are documented:
- Which WCAG success criteria are violated
- Screenshot or description of the issue
- Suggested remediation approach
- Priority level based on impact and difficulty to fix
- Define tool-specific procedures:
- Which scanning tools to use for different types of content
- Standard settings for each tool (e.g., which rule sets to enable in Axe)
- How to export and share results
- Establish responsibilities:
- Who runs which tests at what points in the process
- How issues get assigned for remediation
- Who verifies fixes before closing issues
Clear protocols help make accessibility testing a natural part of the development process rather than a burdensome add-on. They also create accountability by defining who’s responsible for each testing activity.

Beyond Tools | Expert Testing Strategies
While tools form the foundation of accessibility testing, expert strategies elevate your approach to catch more subtle issues that automated tools might miss.
Combining Automated and Manual Testing
The most effective testing approach combines automated scans with targeted manual testing:
- Start with automated tools to catch obvious issues:
- Run Axe DevTools and WAVE scans first
- Fix the clear violations these tools identify
- Use results to spot patterns and potential problem areas
- Follow with focused manual testing:
- Test keyboard navigation for complex interactive elements
- Verify screen reader compatibility for dynamic content
- Check cognitive accessibility factors like clarity and consistency
- Use role-based testing perspectives:
- Test as a keyboard-only user
- Test as a screen reader user
- Test as a user with cognitive limitations
- Test as a user with low vision
According to research, automated testing alone typically catches only 30-40% of accessibility issues, while AI-enhanced tools can identify up to 57%. This still leaves many issues that only human testers can find, highlighting the importance of combined approaches.
User Testing with People with Disabilities
The ultimate test of accessibility is how real users with disabilities experience your site:
- Recruit testers with various disabilities:
- Screen reader users
- Keyboard-only users
- Users with cognitive disabilities
- Users with low vision
- Users with hearing impairments
- Create structured testing scenarios:
- Define specific tasks for users to complete
- Ask users to narrate their experience as they navigate
- Record sessions (with permission) for team review
- Follow up with questions about pain points and suggestions
- Look for patterns across multiple testers:
- Which areas consistently cause problems?
- What workarounds do users develop?
- How do different assistive technologies handle the same content?
- Use findings to:
- Prioritize fixes based on actual user impact
- Improve your internal testing protocols
- Educate the team about real-world accessibility challenges
Even on a limited budget, you can conduct valuable user testing. Start small with 1-2 testers from your target audience, perhaps recruited from local disability organizations or online communities. Their insights will often reveal issues that no automated tool could detect.
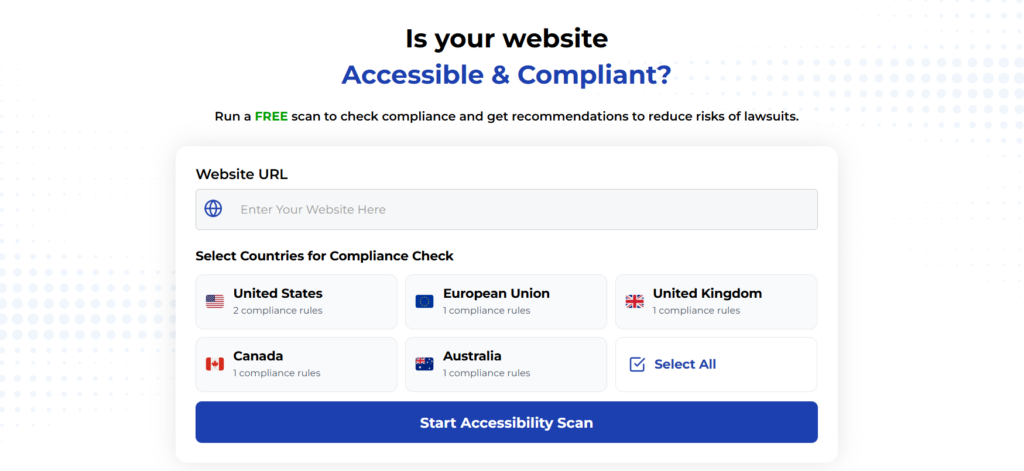
Using Automated Tools for Quick Insights (Accessibility-Test.org Scanner)
Automated testing tools provide a fast way to identify many common accessibility issues. They can quickly scan your website and point out problems that might be difficult for people with disabilities to overcome.
Visit Our Tools Comparison Page!
Run a FREE scan to check compliance and get recommendations to reduce risks of lawsuits
Final Thoughts
Building accessible websites doesn’t require expensive tools or consultants. These five free tools-Axe DevTools, WAVE Evaluation Tool, keyboard testing techniques, color contrast analyzers, and screen reader testing with NVDA-provide a solid foundation for identifying and fixing accessibility barriers.
The key lies not in the tools themselves but in how consistently you use them within a structured testing workflow. By integrating these tools throughout your development process and supplementing them with expert testing strategies, you’ll create more inclusive digital experiences for all users.
Start with one tool today, build familiarity with its features, and gradually expand your toolkit as you gain confidence. Every accessibility improvement, no matter how small, makes the web better for someone who might otherwise be excluded.
Remember that accessibility is an ongoing journey rather than a destination. These tools will help you progress steadily toward more inclusive digital experiences that work for everyone.
Want More Help?
Try our free website accessibility scanner to identify heading structure issues and other accessibility problems on your site. Our tool provides clear recommendations for fixes that can be implemented quickly.
Join our community of developers committed to accessibility. Share your experiences, ask questions, and learn from others who are working to make the web more accessible.