


Small Business Guide to Web Accessibility: 7 Affordable Steps
For a small business owner, the idea of website accessibility can feel overwhelming, often associated with high costs and complex technical standards. But what if making your website usable for people with disabilities wasn’t a financial burden? What if it was actually a smart business move that expanded your market and protected you from legal trouble? The good news is, it can be. You don’t need a massive budget to start making meaningful improvements. This article breaks down a practical, seven-step approach to help your small business website become more accessible without draining your resources. We’ll walk through free tools, low-cost fixes, and smart prioritization so you can meet your goals efficiently.
Why Small Businesses Can’t Ignore Accessibility in 2025
Website accessibility isn’t just a concern for large corporations. In fact, small businesses are increasingly finding themselves at the center of legal actions related to the Americans with Disabilities Act (ADA). Beyond the legal pressures, ignoring accessibility means you’re shutting the door on a significant portion of potential customers. The reality is that a more accessible website is better for everyone; and it’s a market opportunity you can’t afford to miss.
Legal Risks: The Reality of ADA Lawsuits
The number of lawsuits citing non-compliant websites under the ADA has been climbing steadily. These aren’t just targeting big-name companies; small businesses are frequently named in demand letters and legal filings. The financial hit from a lawsuit can be substantial, including legal fees, settlement costs, and the expense of a forced website redesign. For a small business, this kind of unexpected financial blow can be devastating. Investing a small amount in accessibility upfront is far more manageable than facing the potential costs of litigation down the line. It’s a preventative measure that secures your business’s future.
Business Benefits: Reaching a Wider Audience
Did you know that over one billion people worldwide live with some form of disability? This represents a huge, often-overlooked market segment with significant spending power. By making your website accessible, you are directly inviting this group to engage with your products and services. Think about it: if a potential customer using a screen reader can’t navigate your site, they’ll simply go to a competitor whose site they can use. An accessible website is also a better website for all users. The principles of accessible design; clear layout, easy navigation, and readable text; improve the experience for everyone, including mobile users and those with slow internet connections. It’s a win-win.
Step 1: Start with a Free Accessibility Audit
Before you can fix any problems, you need to know what they are. You don’t need to hire an expensive consultant right away to get a baseline understanding of your site’s accessibility status. There are excellent free tools and simple manual checks that can give you a starting point. This initial assessment helps you identify the most common and critical issues, allowing you to create a focused plan of action.
Using Free Automated Testing Tools
Automated testing tools are a fantastic first step. These are often browser extensions or web-based scanners that crawl your site and flag common accessibility failures. Tools like WAVE, Axe DevTools, and Google’s Lighthouse (built into the Chrome browser) can quickly spot issues such as missing alternative text for images, low-contrast text, or missing form labels.
While these tools are invaluable, remember they are only a starting point. They can typically catch between 30-50% of all potential accessibility issues. The rest require a human touch. But for a small business on a budget, running these free scans provides an immediate and actionable list of problems to tackle.
Manual Checks You Can Do Yourself
After running an automated tool, it’s time for a few simple manual checks. You don’t need to be a technical expert to do these. The most important one is the “keyboard check.” Unplug your mouse and try to navigate your website using only the Tab key. Can you get to every link, button, and form field? Can you see where you are on the page at all times (this is called a “focus indicator”)? If you get stuck or can’t tell where you are, you’ve found a major barrier for users who cannot operate a mouse.
Other simple checks include making sure your videos have captions and that you haven’t used color alone to convey information (for example, marking required fields in red without any other indicator). These quick tests give you powerful information about the real-world usability of your site.
Step 2: Fix High-Impact, Low-Cost Issues First
With your audit results in hand, you might have a long list of issues. Don’t get discouraged! The key is to prioritize. Some of the most critical accessibility barriers are surprisingly easy and cheap to fix. By focusing on these high-impact problems first, you can make the biggest difference for your users with the least amount of effort and expense. This approach is all about getting the most value from your time and budget.
Alt Text for Images
Alternative text, or “alt text,” is a brief description of an image that is read aloud by screen readers. It ensures that users with visual impairments can understand the content and purpose of images on your site. Adding alt text is one of the easiest and most important accessibility fixes you can make. Most website content management systems (CMS) like WordPress or Shopify have a simple field where you can add alt text when you upload an image.
Focus on being descriptive but concise. If an image is purely decorative and adds no information, you can leave the alt text blank, but the image must still have the alt attribute (alt=””). For all other images, describe what you see. For an image of a person, a simple “A woman smiling while using a laptop” is far more helpful than “image123.jpg.”
Color Contrast Improvements
Have you ever struggled to read light gray text on a white background? This is a color contrast issue. Many people with low vision need a strong contrast between text and its background to read comfortably. WCAG (Web Content Accessibility Guidelines) has specific ratios that define acceptable contrast.
Luckily, you don’t have to guess. There are many free online contrast checkers where you can input your text and background colors to see if they pass. If they don’t, the fix is usually as simple as changing a color value in your website’s CSS file or theme settings. This small change can make your content readable for a much wider audience.
Keyboard Navigation Basics
Remember that keyboard check from Step 1? The issues you found are often straightforward to fix. The most common problem is a “keyboard trap,” where a user can tab into a section of the page but cannot tab out. Another is a missing or invisible focus indicator, which makes it impossible to see which element is currently selected.
Fixing these might require a little help from a developer if you’re not comfortable with code, but they are generally not time-consuming tasks. Ensuring a logical tab order (so users move through the page in a way that makes sense) and a clearly visible focus style are foundational to an accessible experience.
Step 3: Choose Budget-Friendly Testing Tools
While free tools are great for getting started, you may eventually want a more structured way to track your progress and catch more complex issues. The market for accessibility tools is broad, but you don’t have to jump straight to the most expensive enterprise-level software. There are many affordable options that deliver professional-level results, and knowing when to stick with free tools versus when to invest can save you a lot of money.
Free Tools That Provide Professional Results
Let’s not move on from the free tools too quickly. Some of them are powerful enough to be mainstays in your accessibility toolkit. Beyond the initial scan, browser extensions like Axe DevTools can be integrated into your development process, allowing you to check for issues before they even go live. The WAVE browser extension provides a highly visual way to see your page’s structure, which is fantastic for spotting heading-level issues or reading order problems.
These tools are not “lite” versions; they are professional-grade checkers that form the basis of many accessibility experts’ workflows. Learning to use them effectively is a skill that will serve your business well, costing you nothing but time.
When to Invest in Paid Solutions
So, when does it make sense to pay for a tool? Paid solutions often offer features that are particularly helpful for ongoing management. For example, they might provide sitewide scanning and monitoring, automatically checking your entire site on a regular schedule and alerting you to new issues. This can be a huge time-saver compared to checking pages one by one.
Paid platforms also tend to offer more detailed reporting and issue-tracking features, which can be useful if you have a team working on fixes. Some provide guided remediation, offering specific code suggestions to fix the problems they find. If you find that you’re spending too much time manually re-checking pages or struggling to manage your list of fixes, a low-cost subscription service could be a smart investment.
Step 4: Focus on Your Most Important Pages
Trying to make your entire website perfectly accessible all at once can be a daunting task. A more manageable approach is to focus your initial efforts on the pages that are most critical to your users and your business. This is often referred to as a “key user journey” analysis. By securing the accessibility of these core pathways first, you ensure that most users can accomplish their primary goals on your site, such as contacting you or buying a product.
Homepage and Contact Page Priorities
Your homepage is your digital front door, and your contact page is often the primary way customers get in touch. These two pages should be at the top of your priority list. A user who can’t navigate your homepage is unlikely to explore further. A customer who can’t use your contact form because it’s not accessible is a lost lead.
Run your automated and manual checks on these pages first. Fix all the issues you find here before moving on. Make sure the navigation is clear, all images have alt text, and your contact form is fully keyboard-accessible and has proper labels for every field.
Product/Service Pages
After your homepage and contact page, turn your attention to the pages that describe what you sell. These are the pages that persuade customers to do business with you. All the information on these pages must be accessible. This includes product images, descriptions, specifications, and pricing tables.
If a user with a visual impairment can’t access the details of your service or the specifications of your product, they cannot make an informed purchasing decision. Ensure that headings are used correctly to structure the content, making it easy to scan, and that any “buy now” or “add to cart” buttons are clearly labeled and accessible.
Checkout and Forms
If you sell directly from your website, your checkout process is the most critical user journey of all. An inaccessible checkout process is a guaranteed way to lose sales. Every single step; from adding an item to the cart to filling out shipping information and submitting payment; must be simple and accessible.
Forms are notoriously tricky for accessibility. Every form field must have a visible, programmatically associated label. Error messages must be clear and specific (e.g., “Please enter a valid email address” instead of just turning the field red). The entire process must be navigable with a keyboard. Fixing your checkout flow should be a top priority.
Step 5: Implement Accessibility Widgets (If Needed)
You’ve probably seen them: small icons on websites that open up a menu of accessibility adjustments. These are often called accessibility “widgets” or “overlays.” They promise a quick, one-line-of-code fix for your website’s accessibility problems. The reality is far more complicated. While they can offer some limited benefits, they are not a substitute for fixing the underlying code of your website. However, for a small business on a tight budget, they can be a temporary bridge.
Widget Solutions Under $100/month
Many companies offer these widgets on a subscription basis, with plans often starting at less than $100 per month. These tools add a script to your site that attempts to automatically fix some common issues and provides a user-facing toolbar to adjust things like text size, contrast, and animations. For a business facing a sudden legal demand, they can sometimes be a way to show a good-faith effort while you work on more permanent solutions.
Widget Limitations and Considerations
It’s absolutely essential to understand what these widgets do not do. They cannot fix all accessibility issues. They often miss problems that require manual remediation, such as illogical page structure or uncaptioned videos. Furthermore, some accessibility experts and users with disabilities find them frustrating to use, as they can interfere with their own assistive technologies. The general consensus in the accessibility community is that widgets are not a full solution for ADA compliance. Think of them as a potential temporary aid, not a permanent fix. Your primary goal should always be to make your actual website code accessible.
Step 6: Create an Accessibility Statement
An accessibility statement is a public page on your website that signals your commitment to accessibility. It’s a sign of transparency and a valuable resource for your users. In it, you can describe the steps you’ve taken to make your site accessible, the standards you’re aiming to meet (like WCAG 2.1 Level AA), and any known issues you are currently working to fix.
This statement does two important things. First, it provides helpful information to users with disabilities, letting them know what to expect and how to best use your site. Second, it can be a positive signal from a legal perspective, as it demonstrates that you are aware of your obligations and are actively working to meet them. There are many free templates available online that you can adapt for your business.
Step 7: Ongoing Monitoring and Maintenance
Website accessibility is not a one-time project; it’s an ongoing commitment. Every time you add a new page, post a new blog, or upload a new product, you have an opportunity to either maintain or break your site’s accessibility. The final step in your budget-friendly plan is to establish a simple process for ongoing monitoring.
This doesn’t have to be complicated. It can be as simple as creating a checklist that you run through before publishing any new content. Does the new page have a proper heading structure? Do all new images have alt text? Is the new video captioned? You can also schedule a quick check with your free automated tools on a monthly or quarterly basis to catch any regressions. By making accessibility part of your regular website maintenance routine, you can maintain the progress you’ve made without significant ongoing costs.

Total Cost Breakdown: What Small Businesses Really Spend
So, what does this all add up to? Making a website accessible doesn’t have to mean a five-figure investment. By using a prioritized approach and leaning on free tools, the cost can be very manageable.
Here is a sample breakdown of potential costs.
| Item/Action | DIY/Low-Cost Approach | Potential Cost |
| Initial Audit | Use free tools (WAVE, Axe) and manual keyboard checks. | $0 |
| Image Alt Text | Add descriptions in your CMS as you upload images. | $0 |
| Color Contrast | Use a free online checker and adjust theme colors. | $0 – $150 (for a few hours of developer time if needed) |
| Keyboard Navigation Fixes | A developer can often fix basic focus issues quickly. | $150 – $500 (depending on complexity) |
| Accessibility Statement | Adapt a free online template for your business. | $0 |
| Ongoing Monitoring | Use free tools and a content publishing checklist. | $0 |
| Optional: Widget | A low-cost subscription as a temporary measure. | $50 – $100 per month |
As you can see, a huge amount of progress can be made for little to no cost. The primary investment is time; time to learn, time to test, and time to implement fixes. For issues that require a developer, focusing on the high-impact fixes first keeps those costs contained. For a few hundred dollars, you can often resolve the most critical barriers on your site, protecting you from lawsuits and opening your business to a new market of customers.
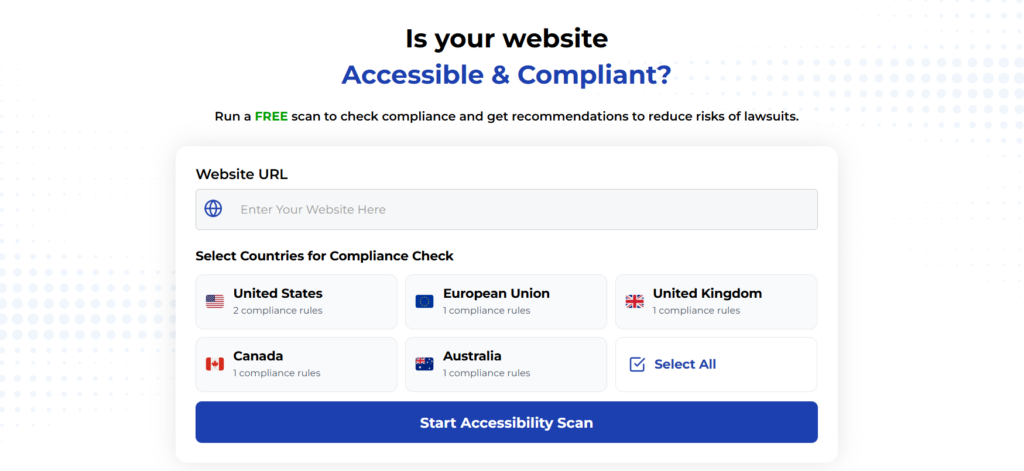
Using Automated Tools for Quick Insights (Accessibility-Test.org Scanner)
Automated testing tools provide a fast way to identify many common accessibility issues. They can quickly scan your website and point out problems that might be difficult for people with disabilities to overcome.
Visit Our Tools Comparison Page!
Run a FREE scan to check compliance and get recommendations to reduce risks of lawsuits
Final Thoughts
Ready to take the first step? Start by running a free accessibility scan on your homepage. You might be surprised by how much you can accomplish on your own.
Start your compliance journey, update your accessibility statement, and keep EAA top of mind in every project going forward.
Commit to accessibility testing today. The sooner you start, the sooner everyone can benefit from your content and services; no exceptions.
Run a Free Scan to Find E-commerce Accessibility Barriers
Want More Help?
Try our free website accessibility scanner to identify heading structure issues and other accessibility problems on your site. Our tool provides clear recommendations for fixes that can be implemented quickly.
Join our community of developers committed to accessibility. Share your experiences, ask questions, and learn from others who are working to make the web more accessible.