Financial Services Web Accessibility – Banking Portal Requirements
PDF accessibility ensures that documents are usable by everyone, including people with disabilities who use assistive technologies like screen readers. Research shows that 60-70% of digital platforms have significant accessibility barriers that prevent equal access to information. This article provides clear, practical steps to make your PDF documents accessible, from basic tagging to advanced features and validation techniques.
Foundational Tagging Requirements
The foundation of an accessible PDF is proper tagging. A “tagged PDF” contains an underlying tag structure that defines the document’s organization, similar to HTML. Without these tags, assistive technologies cannot properly interpret headings, lists, tables, or images.
Many document creation tools don’t automatically generate properly tagged PDFs. Microsoft Word, PowerPoint, and Adobe InDesign export to tagged PDFs, but Google Docs and many other tools do not. If you’re starting with an untagged PDF, you’ll need Adobe Acrobat Pro DC to add the necessary tags.
Document Structure Hierarchy

PDF structure follows a similar logic to HTML, requiring a clear hierarchy of elements that assistive technologies can navigate. The document hierarchy should include:
- Document title (properly set in the file properties)
- Major sections with appropriate headings
- Paragraphs, lists, and tables with correct tags
- Images with alternative text
To begin structuring your PDF in Adobe Acrobat Pro:
- Open the Accessibility tool panel from the Tools tab
- Select “Autotag Document” to create a basic tag structure
- Open the Tags panel from View > Show/Hide > Navigation Panes > Tags
- Review the generated tag tree for accuracy
While autotagging provides a starting point, manual review and correction are almost always necessary. The tag tree should mirror the logical organization of your content, with each element properly identified by its role (heading, paragraph, list, etc.).
Heading Level Implementation
Headings are crucial navigation points for screen reader users, functioning like a table of contents. PDF documents should use proper heading levels (H1, H2, H3, etc.) in a logical hierarchy:
- H1: Main document title (use only once per document)
- H2: Major sections
- H3: Subsections
- H4: Further subdivisions as needed
To implement or fix heading tags in Acrobat Pro:
- Open the Tags panel
- Right-click on a text element that should be a heading
- Select “Properties” from the context menu
- Change the “Type” to the appropriate heading level (H1, H2, etc.)
- Click “Close”
For existing heading tags that need level adjustment:
- Right-click the heading tag in the Tags panel
- Select “Properties”
- Change the heading level in the Type dropdown
- Click “Close”
Proper heading implementation creates a document outline that screen reader users can navigate through keyboard shortcuts, just as sighted users might skim a document visually.
Reading Order Remediation

Reading order defines the sequence in which assistive technology reads content elements. Even properly tagged PDFs can have incorrect reading order, which can confuse screen reader users.
To check and fix reading order in Acrobat Pro:
- Go to Accessibility tools
- Select “Reading Order” tool
- The tool displays numbered regions showing the current reading order
- If the order is incorrect, you can fix it by:
- Using the Reading Order panel to select and reorder content
- Dragging tags in the Tags panel to reposition them
- Using the Order panel (View > Show/Hide > Navigation Panes > Order)
Common reading order issues include:
- Columns being read across instead of down each column separately
- Sidebars interrupting main content
- Footnotes appearing mid-paragraph
- Figure captions being read before or long after their images
As noted in search result, “An inaccurate reading order can significantly disrupt the user experience, leading to confusion and misinterpretation.” For example, if references appear between introductory paragraphs, screen reader users will hear citations before understanding the related context.
Multi-column Layout Solutions
Multi-column documents present special challenges for reading order. By default, PDF readers might interpret the content horizontally across columns rather than reading down each column separately.
To fix reading order in multi-column layouts:
- Open the Order panel (View > Show/Hide > Navigation Panes > Order)
- Verify that each column is grouped separately and in the correct sequence
- If needed, select content blocks and use the Reorder buttons to adjust their position
- Test by using the Read Out Loud feature (View > Read Out Loud) to hear the content in sequence
Alternatively, use the Reading Order tool:
- Select the Reading Order tool from the Accessibility panel
- For each column, draw a box around the entire column
- Right-click inside the box and select “Mark as Content”
- Ensure the content blocks are numbered in the correct reading sequence
Remember that logical reading order isn’t always top-to-bottom, left-to-right. For example, in a data table, the screen reader should read the header cell before the data cell below it to provide context.
Advanced PDF Features
Beyond basic tagging and reading order, PDFs often contain interactive elements that require special attention for accessibility.

Accessible Form Field Creation
Forms are common in PDFs but present particular accessibility challenges. Unlike HTML, where visible labels are directly associated with form fields, PDF form fields require separate “Tooltip” text for screen readers.
To create accessible form fields:
- Open your document in Acrobat Pro
- Go to Tools > Prepare Form
- Acrobat will detect form fields or you can add them manually
- For each form field:
- Right-click and select “Properties”
- Add a clear, descriptive Tooltip that matches the visible label
- Set the appropriate tab order
- Provide clear instructions for completion
The four essential steps for making accessible PDF forms are:
- Adding the correct form fields
- Including descriptive text in the Tooltip
- Adding proper tags to the form fields
- Checking and fixing the tab order
For form field types, consider these accessibility aspects:
Text fields: Ensure they have clear tooltips and sufficient space for input, especially for users with motor limitations.
Checkboxes and radio buttons: Group related options logically and ensure they can be selected using keyboard navigation (Tab to move between fields, Space to select).
Dropdown menus: Make sure all options are readable by screen readers and can be navigated with keyboard controls.
Submit buttons: Provide clear labels and ensure they’re keyboard accessible.
As noted in search result, “Because of the way assistive technology uses tab keys to navigate digital content, it accesses fillable forms in two separate ways. The first is Reading Mode, which reads all the visible information on the form (including the field descriptions) just as anyone would read a text document. The second is Edit Mode, which allows the assistive technology user to fill in the fields, and to read the digital tooltips associated with those fields.”
Interactive Button States
Interactive buttons in PDF forms need clear visual indicators and proper tagging to be accessible. Each button should:
- Have a descriptive label that clearly indicates its function
- Include alt text that explains the button’s purpose
- Show visible state changes (hover, focus, activated)
- Be operable via keyboard (typically using Enter or Space)
To make buttons accessible in Acrobat Pro:
- Select the button in the form
- Right-click and choose “Properties”
- In the Options tab, set a descriptive tooltip
- In the Actions tab, verify that actions trigger appropriately with keyboard interaction
- Make sure the button is properly tagged in the Tags panel as a “Form” element
For complex interactive elements, test with screen readers to confirm they announce the button’s purpose and state changes appropriately.
Complex Table Accessibility

Tables in PDFs require special attention to be accessible. Screen readers need to understand the relationship between headers and data cells to make sense of the information.
To create accessible tables:
- Ensure tables are properly tagged as table elements (<Table>, <TR>, <TH>, <TD>)
- Mark header cells with <TH> tags and data cells with <TD> tags
- Specify the scope attribute for header cells (column, row, both)
- For complex tables, add table summaries or captions that explain the table’s purpose
In Acrobat Pro, you can fix table tags by:
- Opening the Tags panel
- Finding the table structure in the tag tree
- Right-clicking on header cells and selecting “Properties”
- Setting the Type to “TH” for header cells
- Adding scope attributes (Row, Column, Both) as appropriate
For example, a simple table should have this structure in the Tags panel:
<Table>
<TR>
<TH scope=”col”>Name</TH>
<TH scope=”col”>Age</TH>
</TR>
<TR>
<TD>John</TD>
<TD>35</TD>
</TR>
</Table>
Data Cell Relationships
For tables to be truly accessible, screen readers must understand the relationships between header cells and data cells. This is especially important for complex tables with multiple levels of headers.
To establish proper data cell relationships:
- Make sure all header cells use <TH> tags with appropriate scope attributes
- For complex tables with both row and column headers, use ID and Headers attributes
- For merged cells, ensure the proper rowspan and colspan attributes are set
- Test with a screen reader to verify the relationships are properly understood
In Acrobat Pro, to set ID and Headers attributes:
- Right-click a header cell in the Tags panel
- Select “Properties”
- In the Tag tab, enter a unique ID in the ID field
- Right-click a data cell that relates to this header
- In the Tag tab, enter the header’s ID in the Headers field
For tables with merged cells or complex structures, consider simplifying their design or breaking them into multiple simpler tables when possible.
Validation and Compliance
After implementing accessibility features, thorough testing and validation are essential to ensure your PDF works properly with assistive technologies.
Screen Reader Testing Protocols
The most authentic way to test PDF accessibility is with actual screen readers used by people with disabilities. Common screen readers include:
- JAWS (Job Access With Speech)
- NVDA (NonVisual Desktop Access)
- VoiceOver (built into macOS and iOS)
- TalkBack (built into Android)
To perform basic screen reader testing:
- Open your PDF in Adobe Acrobat Reader or another PDF viewer
- Start your screen reader
- Navigate through the document using standard screen reader commands
- Check if all content is read in the correct order
- Verify that headings, lists, and tables are properly announced
- Test form field navigation and completion
- Confirm that images have appropriate alternative text
When testing with screen readers, verify these specific aspects:
- Document title is properly announced
- Heading structure allows for easy navigation
- Tables are readable and maintain context between headers and data
- Form fields are properly labeled and can be completed
- Links and buttons are accessible and their purpose is clear
As noted in search result, “For a document to achieve digital accessibility, a person with disabilities must be able to open, read, and navigate it as easily as someone without any impairments.”
Automated Checker Workflows

While human testing is essential, automated tools can help identify many common accessibility issues:
- Adobe Acrobat Pro Accessibility Checker
- Go to Tools > Accessibility > Full Check
- Select which checking options to include
- Review and address the reported issues
- PDF Accessibility Checker (PAC)
- A free tool for checking PDF/UA compliance
- Provides detailed reports on accessibility issues
- CommonLook PDF Validator
- A plugin for Adobe Acrobat that checks against various standards
- AxesPDF
- Useful for checking language settings and form fields
When using automated checkers, follow this workflow:
- Run the full accessibility check
- Address fatal errors first (like missing tags or improper structure)
- Fix document properties (title, language, etc.)
- Work through form field issues
- Correct table structure problems
- Add missing alternative text
- Re-run the check to verify fixes
- Perform manual review and testing with screen readers
Remember that automated tools cannot catch all issues. As noted in search result, some checks require manual verification, particularly for:
- Reading order accuracy
- Appropriate alternative text quality
- Meaningful heading structure
- Color contrast sufficiency
- Proper link context
PDF Accessibility Testing With Student Personas
Testing with realistic scenarios helps ensure your PDFs work for actual users. Create student personas representing different disabilities to test various aspects of accessibility:
- Jamie: A blind student using JAWS screen reader and keyboard navigation
- Alex: A student with ADHD who benefits from clear structure
- Morgan: A student with motor limitations using voice recognition
- Taylor: A deaf student who relies on visual information
Test complete user journeys rather than isolated elements, such as:
- Opening and navigating the document
- Finding specific information using headings
- Completing and submitting form fields
- Understanding complex tables and charts
- Following links to external resources
Document findings from each persona’s perspective, noting both technical compliance issues and usability problems.
Document Metadata and Properties

Proper document metadata improves accessibility for all users:
- Document Title
- Go to File > Properties > Description
- Add a clear, concise title
- Under Initial View, set Display to “Document Title” instead of filename
- Document Language
- Go to File > Properties > Advanced
- Set the Language field to the primary language of the document
- For documents with multiple languages, tag sections in different languages accordingly
- Document Security
- Ensure security settings don’t block screen reader access
- Go to File > Properties > Security
- Check “Enable text access for screen reader devices for the visually impaired”
Proper metadata helps users find and identify your document before opening it, and tells assistive technology what language to use for proper pronunciation.
Accessible PDF Document Creation Workflows
Creating accessible PDFs from the start is more efficient than fixing inaccessible documents later. Follow these best practices:
- Create accessible source documents
- Use styles for headings and structure in Word or InDesign
- Add alt text to images in the source document
- Create proper tables with header rows
- Use built-in list formatting
- Export with accessibility options enabled
- In Word: File > Save As > PDF > Options > check “Document structure tags for accessibility”
- In InDesign: Export > Adobe PDF > check “Create Tagged PDF”
- Check and enhance in Acrobat Pro
- Run the Accessibility Checker
- Fix any remaining issues
- Enhance the tag structure as needed
- Verify reading order
This workflow minimizes the need for extensive remediation and ensures consistency across documents.
Inclusive Language in PDF Documentation

When creating PDF documents, use language that respects all users. Avoid terms that may be considered harmful or exclusionary:
- Use “people with disabilities” rather than “the disabled” or “handicapped”
- Avoid phrases like “suffers from” or “confined to a wheelchair”
- Use “wheelchair user” instead of “wheelchair-bound”
- Prefer “person with a disability” over terms like “differently abled”
Also avoid tech terms with problematic origins:
- Use “main/primary” instead of “master”
- Use “deny list/allow list” instead of “blacklist/whitelist”
- Use “primary/replica” instead of “master/slave”
Using inclusive language demonstrates respect for all users and creates a more welcoming document experience.
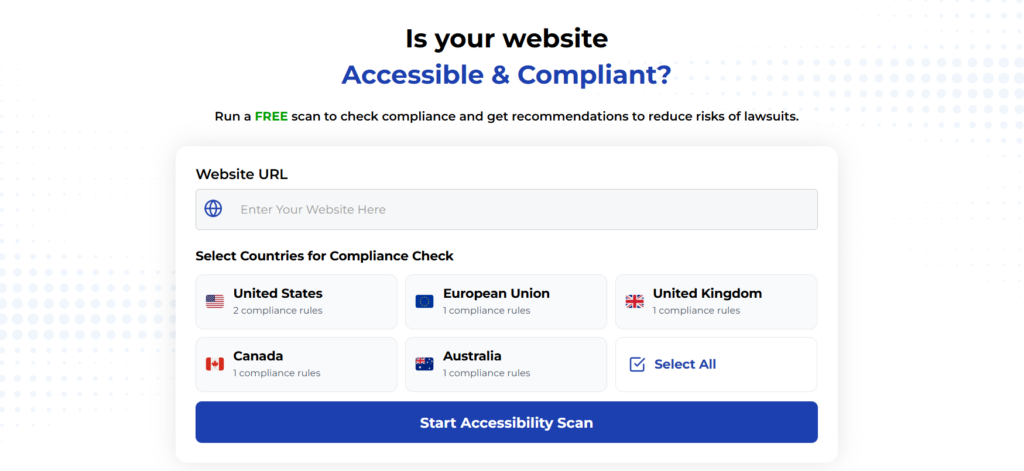
Using Automated Tools for Quick Insights (Accessibility-Test.org Scanner)
Automated testing tools provide a fast way to identify many common accessibility issues. They can quickly scan your website and point out problems that might be difficult for people with disabilities to overcome.
Visit Our Tools Comparison Page!

Run a FREE scan to check compliance and get recommendations to reduce risks of lawsuits
Final Accessibility Checklist
Before publishing your PDF, verify these key accessibility features:
- Document is properly tagged with logical structure
- Reading order follows the visual layout appropriately
- Headings use proper hierarchy (H1, H2, H3)
- Images have meaningful alternative text
- Tables have proper header cells and structure
- Form fields have clear labels and instructions
- Links have descriptive text
- Document language is specified
- Document title is set and displayed
- Bookmarks are provided for documents over 20 pages
- Color is not used alone to convey meaning
- Text has sufficient contrast with background
- Security settings allow screen reader access
This checklist helps ensure you’ve addressed the major accessibility requirements before distribution.
Making PDFs accessible isn’t just about compliance—it’s about creating equal access to information for all users. By following these implementation steps, you create documents that work better for everyone, including people with disabilities.
Run a FREE scan to check compliance and get recommendations to reduce risks of lawsuits.


